
Empower every learner
Experience the inclusive and assistive tools available in Chromebooks and Google Workspace, supporting all students to participate, collaborate, and achieve their best in the classroom.
Speaker 1:
Hi, my name is Zrinka and I'm from Digital Support Team from T4L.
Speaker 2:
Hi, I'm Joe. I'm from the Disability Inclusion team. I'm looking forward today to jump into our Chromebooks and finding out about some of the amazing accessibility features that are built in to these devices. I know there's some great tools that can support all students in the classroom and some that can be personalised even further to support our students with disability. So yeah, excited to hear about some of those.
Speaker 1:
So many great features that are built into our Chromebooks and something to bear in mind that technology does move fast. So sometimes some of the things that we are showing might be in a slightly different place, but we will show you a few different ways that you can access these really handy tools.
The first is actually just navigating to the bottom of the screen with your cursor and on the shelf or the toolbar, you will notice that if I click on the time in the bottom right-hand corner, I will open up a menu, and here, I can click on to accessibility tab.
I have quick access to all of those great tools and I can really easily toggle tools on and off. There are some great tools like Dictation that we will unpack a little bit further and Magnifiers, but there are also some tools we don't have time for today like Switch Access as well.
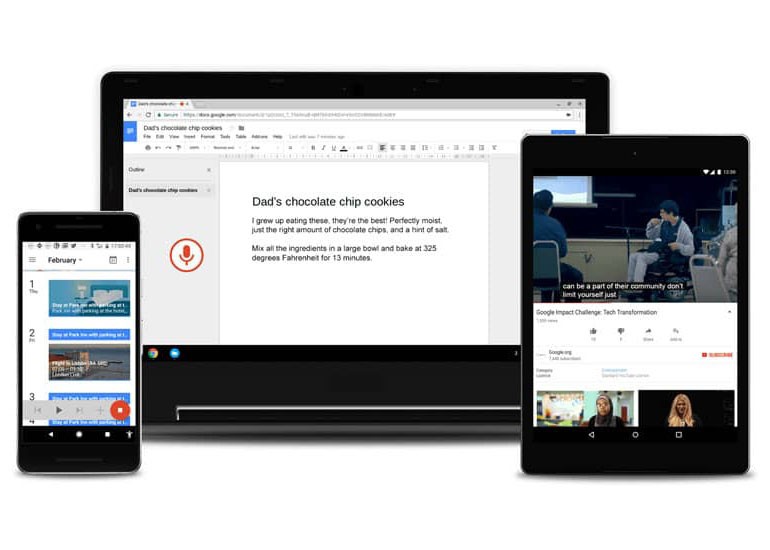
I will toggle the Dictation on and you'll notice that as soon as I do, a little microphone will appear down the bottom. And if I click on that, if I'm in a space where I can put a cursor in, it will start recording my speech. Really handy tool for our students.
Speaker 2:
Yeah, such a powerful tool for students who might have difficulties with their spelling or typing. They can quickly turn that on and just talk into the device wherever they are and have the words written for them. So that's a great feature.
Speaker 1:
Another really handy feature is select to speak. Again, in this space, I'm just going to toggle it on and it is going to pop a little icon down the bottom. If I click on it, it will allow me to select part of the screen that I want read aloud. You'll notice that as soon as I select the screen, it will start reading. A little control bar will pop up. I can pause the speech. I can also adjust the speed of the text as well as it's being read.
Speaker 3:
Our schools inspire excellence. High quality teaching, incredible-
Speaker 1:
The feature that I do like here as well is if I click on that time in the bottom right-hand corner, if I click on Accessibility, I will see all of those tools that I have enabled and I can really easily also turn them off.
Another two great little tools for our students who might be blind or who might need some visual support are the Magnifiers. There are two types. If I click on or toggle on Full-screen magnifier, you'll notice that my whole screen is blown up. And as I'm moving across the screen, it is showing those sections enlarged as well.
Speaker 2:
That's a great feature for our students who might have low vision who need to zoom in on a particular area, but also for our teachers who can bring that up on a screen and help focus attention onto a particular area of the screen as well.
Speaker 1:
And I do like that we have two options. So everybody prefers the way that they are accustomed to and used to learning and accessing learning. So I can also use Docked magnifier. As soon as I toggle that on, you'll notice that there is a little dock that appears at the top of my screen. And as I'm moving my cursor across the screen down the bottom, it is showing me just those sections that are being magnified as well. A few different options in this space.
I'm just going to go back and click on accessibility and toggle those features off. And as I said, I will show you a different way of getting to those accessibility tools as well. Again, it might be different depending on what device you are using. You might have a little settings cog or you might want to click on the time and click on the settings cog in this space. It will bring up the settings menu.
On the left-hand side, lots and lots of settings, but we are looking for Accessibility tools. When I click on that, you'll notice that there are different sections according to different needs that our students might have. So we might look at Keyboards and inputs so we can actually turn on the touch keyboard as well. But another one that I thought would be really handy to showcase is the ChromeVox. Joe, can you tell us a little bit about the ChromeVox?
Speaker 2:
Yeah, absolutely. So ChromeVox is the inbuilt screen reader. So a screen reader is really a tool that helps support students who are blind or low vision. It will read everything on the screen to the student, help them to navigate that digital content, and also help them become more independent in their learning as well.
Speaker 1:
Such a great tool and I will toggle it on or turn it on in a little bit, but I will explain because as soon as I toggle it on, it will start reading and highlighting the sections of the screen that it is reading out loud. You will notice that there is a section where we can adjust the settings and personalise the ChromeVox tool itself. And also there is a great ChromeVox tutorial, which I would recommend. So I'll turn it on now and we'll see how it works.
Speaker 4:
Chromebook volume slider, 75%. ChromeVox spoken feedback is ready. ChromeVox settings, subpage button. ChromeVox tutorial link. Opens a new tab group.
Speaker 1:
A nice little feature that I do love is that we can use our keyboard shortcuts, Control Alt Z, to quickly turn it on and to turn it off as well.
Speaker 2:
Really important for teachers when they're first testing that out, you need to be able to know how to turn it off quickly. Yeah.
Speaker 1:
Definitely.
To learn more about different Chromebook accessibility features, we can jump into our T4L website from the homepage, navigate to Teaching and Learning, then to Technology for Learning. From here, we are looking for Resources, Professional Learning Resources, Inclusive and Assistive Technology, and then jumping into the Google section.
You'll notice that we do have a couple of videos that are here that will help you with learning about some Speech to text tools that are built into Google Workspace, but also into Chromebooks. And if I scroll down, you'll see that we have broken these tools into Chromebook device tools and Google Workspace tools as well as different needs. So expanding any of those dropdowns will provide you with a link that will take you to the website with a lot more information. And if we scroll all the way to the bottom, we do have a link to Google accessibility page, which has the most up-to-date information on all of those fabulous tools that we have access to and our students do too.
Speaker 2:
Some great resources there and I love how easy it is to toggle on those accessibility features for students and be able to personalise them even further for students that need a little bit extra. So that's fantastic.
Speaker 1:
Definitely a lot to explore.
Speaker 2:
Yes, right. Go ahead, jump into those and give them a go. Thank you so much.
Speaker 1:
Thank you.
Chromebook devices accessibility features
Learn Chromebook accessibility tools, supporting all students and personalising help for disabilities.
Speaker 1:
Hi, my name is Zrinka Krivosic and I'm a part of Digital Support Team with T4L.
Speaker 2:
Hi, I'm Joe. I'm from Disability Inclusion. Really excited today to jump into some of the Google Workspace accessibility features. So many of our teachers and students are using Google Workspace, and there's a range of accessibility features in there that are good for all students in the classroom, but can really be personalised for those individual students with disability as well. So yeah, keen to hear about some of those today.
Speaker 1:
Fantastic. And definitely we'll just probably touch on the surface. There are so many great features in our Google Workspace tools. One thing that I will mention is that our technology does keep changing quite rapidly. So if we are showing you something today, it might be that tomorrow when you jump in there might be a new feature, which is what happens, which is excellent. But it also means that sometimes the buttons or the names might change a little bit, but those features are definitely a great support for all of our students.
And the first one that I thought we would showcase is the Braille Support. And it is really easy in our Google Workspace tools to actually enable that tool to be utilised by our students. So I'll just show on my screen, I have jumped into Google Doc and on the top of our page, we do have our tabs. I will click on the tools section and then jump into the accessibility features all the way down the bottom. This is where we can turn that Braille Support on. Can you tell us a little bit about that Joe.
Speaker 2:
Yeah, absolutely.
Speaker 1:
... how it works?
Speaker 2:
So Braille Support is a very specific option to support students who use a refreshable braille display. So that's a device that can connect to a student's laptop. And when they're in Docs Forms, Google Sheets, Slides, I think even drawings, they can actually access any of that information and it comes through their device in Braille. So there's actual tactile pins that go up and down as they go through the information. So by turning that on like you've just done there, that means students now can access the same document as every other student in the classroom, but they can access it using Braille. So, really powerful feature there.
Speaker 1:
Fantastic. Now, one feature that I do love in Google Docs that has had a little bit of an update recently also lives in tool section and that is the Voice typing. And it now allows us not only to type up speech that is spoken in English, but we can actually select different languages. A great feature for our EAL/D students that's now been updated.
The other little feature that I will showcase is going to be in Google Docs as well. And I have a document here that can be quite long and students might be working on a long document as well. And we have a really simple way of putting or building out a contents page on the left-hand side to allow us to quickly jump to different sections as well. And it's really easily done by selecting, for instance, a title or a sentence that will serve as a title and changing it from the normal text to a title.
And you'll notice straight away that on the left-hand side, I have now added a section. If I scroll anywhere in my document and click on that particular section, it will bring me to that spot. And the other little feature that I do love is adding visuals. And I know it can make a big difference in our students and how they interact with the content.
Speaker 2:
Yeah, absolutely. Visual supports are really important for all students, particularly students with disability. Just some simple images or it can be even symbols or even things like emojis and things can just be another tool to enhance students' understanding of the text and information. Yeah.
Speaker 1:
Fantastic. To add either an image or even a simple emoji, in Google Docs, all I need to do is go to the Insert tab at the top of the screen. Here I have the option to insert an image. Might be something that lives on my computer or I can search for it on the web as well, but I do love jumping down to symbols. This is where emojis are. And for instance, I could search for marine life because that sort of is in line with our theme. There is a little jellyfish and it does add it at the front of our title, but you'll also notice it appears on that contents list as well, which is quite handy for our students to visually be able to gauge what that section is all about.
Speaker 2:
Really helpful for students to be able to navigate the page, but also students who use a screen reader. By having a document structured like that with headings and paragraphs, it allows them to be able to move through that document and listen to the information as well, so that's great.
Speaker 1:
Perfect. I have jumped into the Google Chrome browser and opened up a webpage. It is quite a busy page, lots of links, lots of images, lots of distractions for our students. So, there is a nice little feature called the Reading Mode that we can access to clean up that page and just make it a little bit more accessible for our students. And it will also read the page to our students.
I have pinned it up on my screen, but to actually access it and also to customise that look of the Google Chrome browser, all I need to do is click on the three dots and go down to More Tools. The Reading Mode lives here, so I can just open it from here. Or if I go to Customise Chrome, I will be able to toggle on and off features that I want quicker access to while I'm using Google Chrome browser.
If I click on the Reading Mode, it will clean up the page. As I have already been playing with it, I have set a background colour that's different to the white colour that is normally there. I can click on the cog to actually personalise that page even more.
Speaker 2:
There's some great features there I think benefit all students in the classroom, but then you can really personalise them, looking at the colours and the way the information can be read to a student. I was also thinking that a teacher having this on their screen could remove all that clutter that's on a page and be able to show something really nice and clean to the whole class. And then you can have it read aloud too, right?
Speaker 1:
Fantastic. And they do have the option to highlight either words as they're being read or whole sentences, and they can personalise it even more by toggling on or off the links and images. So, if they want to really simplify the page, they can turn those off as well. I will just click play for us to hear how it works.
Speaker 3:
Eyes, no tail, and strong webbed hind feet that are adapted for leaping and swimming. They also-
Speaker 1:
Lots of features we've quickly shown today. There is a little feature that they can also add some extensions to the Google Chrome browser with some additional functionality. To learn more about what extensions are available to our students and teachers, please visit AssessedIT website where you'll be able to see which tools are allowed.
Speaker 2:
There's some great accessibility Chrome extensions as well. So yeah, worth checking those out, but making sure that they are allowed through the AssessedIT. Yeah.
Speaker 1:
To find more information about our Google Workspace tools, please jump onto our T4L website. Jumping into DoE homepage, if you click on Teaching and Learning section, then go through Technology for Learning, Resources, Professional Learning Resources, and Inclusive and Assistive Technology section, you will be able to choose Google from the list. And on the page you can find some great videos about speech to text in our Google Workspace, but also in Google Chrome as well.
Scrolling further down, you will see that we have broken the support tools for our Chromebook devices and for our Google Workspace tools into different support needs for our students. Expanding those dropdowns will provide you with a link that will take you to a page with more information about those particular tools.
Speaker 2:
So, there's some fantastic resources there and some great accessibility features that are built into the Google Workspace. So, really encourage teachers to jump in and give those a go, and thank you so much for your time today.
Google Workspace accessibility features
Explore Google Workspace accessibility features, beneficial for all students and personalised for disabilities.
Chromebook device
Google Chromebook - Dictation
Enable speech recognition on your Chromebook.
- Type with the on-screen keyboard
- Customise touchpad settings to enable mobility-assistive features
- Adjust the keyboard settings to aid accurate typing
- Use Sticky Keys to activate the keyboard shortcut
- Use Switch Access to scan and select the items on your screen
- Move the cursor and enter text with the Chromebook touchscreen
Google Chromebook - Dictation
Enable speech recognition on your Chromebook.
- Magnify the browser window on your Chromebook
- Enlarge on-screen text and visuals
- Zoom in on the entire Chromebook screen
- Magnify just the top third of the screen while keeping the rest resized
- Adjust font sizing for easier reading
- Enlarge the mouse cursor for better visibility
- Use Select-to-Speak on your Chromebook
Google Workspace
Google Workspace - Dictation
Learn how to type with your voice in Google Docs and Google Slides.
Google Workspace - Dictation
Learn how to type with your voice in Google Docs and Google Slides.
Please note: To view the most up-to-date accessibility tools available on your Chromebook or in Google Workspace, visit the Google Accessibility Page. This resource provides comprehensive information on built-in features to support all users.